
It’s officially that time of year when the holidays are over, but it’s still cold outside. Whether taking down holiday decorations bums you out, or you are eager to get back to “life as normal,” it’s always good for your mental health to give yourself some fun things in life to look forward to…especially during the short, holiday-less, days of winter.
One thing my family has tried to do over the last few years is to embrace the “cozy side of winter.” For us, this has meant adding in a few rituals to keep the cold months fun, creative and festive (even without major holidays.) We’ve found that candles, hot tea or cocoa, board games, and – especially – art nights can go a long way in making January cozier and more fun.
In today’s post, I especially wanted to share some creative ideas that you and your family can use to “embrace the cozy” of wintertime with your own family art night tradition! At Sparketh, we believe that staying creative is an important part of thriving in any season of life. Below, you’ll find some wintery family art ideas and craft projects straight from our team of creatives!
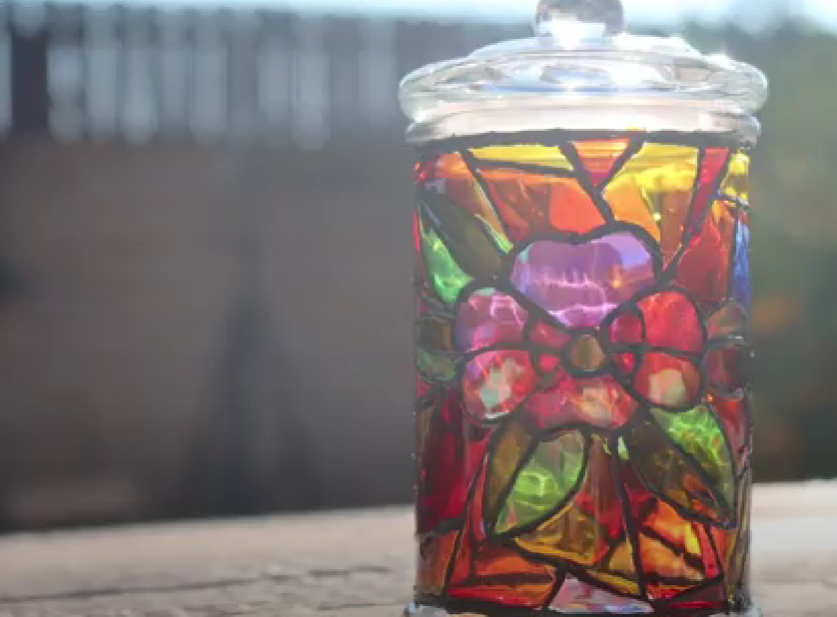
Maria’s Stained Glass Candle Holder
Candles are one of my favorite things to always have at home during winter. They definitely help me through that little post New Year’s slump that many of us experience. They make the whole winter season cozier, more relaxing and more beautiful! If you like candles too (or know someone who does), you will love this craft art project from Sparketh Youtube content creator, Maria. It’d be great for a family art night, especially if you have older kids!

Maria is a talented artist in many mediums, and in this video she’ll show you how to transform something ordinary into a beautiful, stained-glass jar using art! When you’re finished, you can put a real (or battery-operated) candle inside for a luminous, stained glass effect. Even if you’re not a candle person, you can still enjoy the beautiful result as a container or decoration. (You can also gift it!) Click here to watch the video and learn how to make your own stained glass candle holder.
Amy’s DIY Snow and Snowflakes
Were you dreaming of a White Christmas that never happened? Don’t worry, snow doesn’t have to stick to a holiday schedule.
January- February is still a great time to get excited about snow, so why not make your own? In the links below, Sparketh’s TikTok content creator, Amy, will show you how to make DIY Fake Snow that’s fun to fidget and play with.
Click this link to see how to make your own fake snow at home! This is the perfect activity for little kids (just make sure they don’t eat it!)
Before Christmas, Amy also did a tutorial on paper snowflakes that you can use for decoration, but honestly we think it’s cool to decorate your space with snowflakes anytime during winter (or whenever you want!) If you’ve always wanted to try your hand at cutting out those perfect paper flakes, this is your moment!
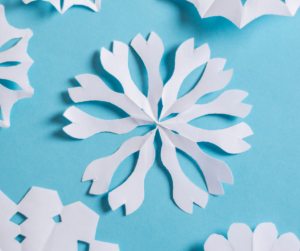
Click here to watch the DIY paper snowflake video on TikTok.
Beyond just snow-inspired videos, Amy is always sharing fun, quick art hacks and tips to try at home. Don’t forget to follow to our TikTok channel so you don’t miss any awesome tips! We strive to contribute to the creative community and offer art education via our social media platforms!
Katie’s “New Year’s Word” Art Night
Have you ever heard of choosing a single word for the New Year instead of writing a list of resolutions?
One of my friends recommended it to me a few years ago, and I love it! Instead of starting off the year with a list of restrictions or rules, starting off with a one word focus can be a very mindful alternative. I have found that choosing one word to focus on is not overwhelming. I also don’t forget it as the year goes by!
Over the past few years, I’ve adapted the process of choosing a word for the New Year into a reflective art night. It’s a great family activity too, especially if you have kids who are old enough to understand the concept of choosing a focus for the new year.
How to do it:
First, you may want to do some reflecting and brainstorming. What was last year like? What do you want to be different this year? What would you like to do (or be) more of in the coming year? What priorities would you like to have, going forward? Try to think of a word that describes the focus you’d like to keep coming back to throughout the year. For example, a couple of my previous words have been, “bravery,” and “Hygge” (which basically means “cozy and peaceful.”)
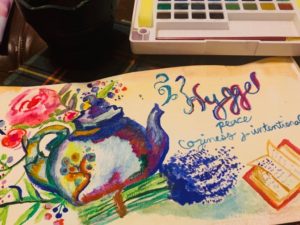
Once you have your word, it’s time to get creative! Using any medium you like, create a work of art that features and reflects the word you choose. This is a great way to spend time thinking about the year ahead!
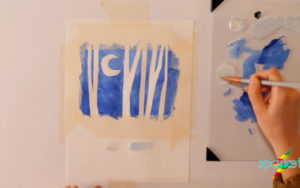
Maddy’s Birch Trees at Night
Birch Trees is a newer course in the Sparketh online course gallery! This watercolor course shows students (of any age) how to create a mysterious, wintery painting that shows birch trees at night. As is the goal with all of our courses, Birch Trees also teaches some pretty cool watercolor techniques that can be applied to original works. We think this is the perfect choice for a family art night. Just gather your supplies and follow along with our super instructor, Maddy! It could not be easier (or cozier.)
Sparketh members can login and follow this link to get to the Birch Tree Course!
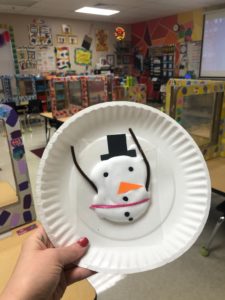
Becca’s Decorative Melting Snowmen
Our Sparketh Community host, Becca, is an art instructor in the digital and physical spaces! In addition to being one of Sparketh‘s art instructors, Becca also teaches art in the classroom. Becca shared this fun “melting snowman” art craft that she did with the students at her school. You need just a few inexpensive supplies for this one, but the kids in your family are going to love it! This makes a great winter decoration (and could be a Christmas ornament for next year, too). Follow her instructions below to create some adorable, silly melting snowmen at home!
What You Need:
• Clear transparency sheet
• Pipe cleaners
• Beads
• Hole punch
• Black and orange paper
• Ribbon
• Shaving cream
• White liquid glue
• Glitter (white or silver)
Prep Ahead of Time (helpful if working with young/multiple kids):
• Cut transparency sheet into a square a little larger than your hand (including fingers)
• Cut brown pipe cleaners into pieces for arms
• Hole punch black paper to use for eyes, mouth, and buttons
• Cut pieces of ribbon for the scarf
• Cut orange papers into triangles for the nose
• Cut black paper into the shape of top hats
How to Make it:
1. The recipes calls for mixing together equal parts of white glue and shaving cream- roughly one cup of each material. However, from my personal experience, I found that overdoing the shaving cream made it even better! Start with the shaving cream and add the glue as you go, checking the consistency. The more glue you add, the denser (and more rubbery) the paint will be. We also sprinkled in silver glitter because- Why Not?!
2. Stir the ingredients together and then play around with it to feel the texture! Smear it, poke it, squish it! (It’s like a fluffy slime!) After you’re done playing, it’s time to assemble! Take a spoonful and place on the transparency square pieces and smear as much as desired. I recommend keeping the shape organic and wobbly like a melted snowman, so you do not have to spread it all the way to the 4 corners! And leave it thick.
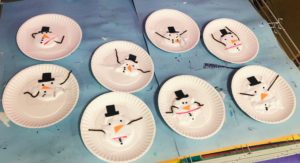
3. Next, add in your pieces wherever you want. Part of the fun of the snowman being “melted” is that things can be arranged however you want. Add in eyes, nose, mouth, buttons, hat, and arms! Since your puffy paint is sticky, all the items will stay on their own! Just lightly place and give a little poke. Poke too hard, and your pieces will disappear into the fluff! Once you have everything arranged the way that you want, set your snowman in a safe space to dry overnight!
4. Use a pipe cleaner and beads of any color to create a colorful handle! Twist together the ends to keep the beads from falling off.
Once the paint has dried, trim the transparency piece to the shape of the dried melted snowman, and hot glue on your handle! We twisted the pipe cleaner together at the ends to make a loop and I only placed a dot of hot glue on the twist and then stuck that onto the back side of the melted snowman, on the transparency piece!
TAH-DAH! A textured, melted snowman decoration! So cute!

We hope that these fun art ideas prompt you and your family to have some creative and cozy nights in this winter! At Sparketh, we believe that creativity blooms at home and that art can be a wonderful way to connect as a family. If you try some of these ideas, be sure to let us know on our social media channels! We’d love to see and share your art! Happy creating.